The Ultimate A to Z Guide on How to Clean a Freshwater Aquarium (Without Killing Your Fish)
Staring at a cloudy tank with algae creeping up the glass? You're not alone. Every freshwater hobbyist eventually faces the "cleaning dilemma" — clean too little, and toxins build up; clean too aggressively, and you can wipe out the very bacteria colony keeping your fish alive. That balance is exactly what this guide will teach you.
Here's the science in a nutshell: fish waste, uneaten food, and decaying plant matter break down into ammonia, a compound that is highly toxic even in tiny concentrations. In a healthy tank, beneficial bacteria convert ammonia into nitrite and then into much less harmful nitrate. But when a tank goes uncleaned for too long, ammonia and nitrate can spike, stressing your fish's gills, suppressing their immune system, and making them vulnerable to disease. Stressed fish are also more likely to show faded colors, clamped fins, and erratic swimming. The good news? A simple, consistent cleaning routine prevents almost all of this. Let's get into it.
Essential Equipment You'll Need
- Gravel vacuum/siphon: The single most important tool for removing debris trapped in your substrate.
- Algae scraper or pad: A magnetic scraper or handheld pad for cleaning glass or acrylic walls.
- Water conditioner (dechlorinator): Neutralizes chlorine and chloramine in tap water instantly.
- Two clean buckets: One dedicated to aquarium use only — never one that's touched soap or household cleaners.
- Aquarium-safe sponge or cloth: For wiping down the tank lid, hood, and outer glass.
- Liquid test kit: To monitor ammonia, nitrite, nitrate, and pH before and after cleaning.
- A turkey baster or pipette: Great for spot-cleaning debris in tight corners or around decorations.
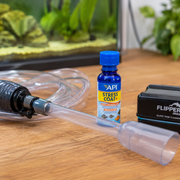
Looking for a durable and efficient gravel vacuum siphon?
🛒 Check Price on AmazonThe Step-by-Step Cleaning Process
Step 1: Prioritize Safety First — Unplug Everything
Before you touch the water, always unplug your heater and, if possible, your filter from the electrical outlet. Heaters can crack or malfunction if they're exposed to air while still powered on, and you don't want any electrical mishaps while your hands are wet. Take 30 seconds here — it's the most important step of the entire process.
Step 2: Scrape Away Algae
Using your algae scraper or pad, work your way around the inside of the glass in smooth, overlapping strokes. Don't worry about being too aggressive here — a little algae is normal and even beneficial for some fish and snails, so you're just aiming for visibility, not perfection. Let the loosened algae float into the water column; you'll remove it in the next step.
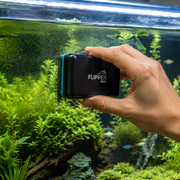
Keep your glass crystal clear with a top-rated magnetic algae scraper!
🛒 Check Price on AmazonStep 3: Siphon the Gravel and Change 20–30% of the Water
This is the heart of aquarium maintenance. Insert your gravel vacuum into the substrate and push it down slightly to pull out trapped waste, uneaten food, and debris. Move methodically across the entire tank floor, section by section, letting the siphon fill your bucket as it draws out old water.
Aim to remove about 20% to 30% of the total tank volume. This is a critical number to remember: never perform a 100% water change on an established tank. A complete water change removes the beneficial bacteria living in the water column and shocks your fish with a sudden, drastic change in water chemistry, temperature, and pH — this is one of the leading causes of "old tank syndrome" crashes and can be fatal. Partial water changes dilute toxins gradually while keeping your tank's biological balance intact.
Step 4: Clean the Filter (The Step Most Beginners Get Wrong)
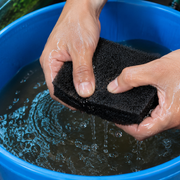
Critical warning: Your filter media (sponges, bio-balls, ceramic rings) is home to the majority of your tank's beneficial bacteria — the same bacteria responsible for converting toxic ammonia into safer compounds. Never rinse filter media under tap water. Tap water contains chlorine or chloramine, which will kill this bacterial colony almost instantly, potentially triggering a dangerous ammonia spike days later (often called a "mini-cycle").
Instead, scoop out a cup of the old tank water you just siphoned out and use it to gently swish and squeeze the filter media in that bucket. You only need to remove excess sludge, not sterilize it. Clean your filter media this way once every 2 to 4 weeks, and never clean all filter media at once — stagger it to preserve bacterial colonies.
Need safe water conditioners or replacement filter media?
🛒 Check Price on AmazonStep 5: Add Fresh, Conditioned Water
Fill your second clean bucket with tap water at roughly the same temperature as your tank. Add your water conditioner according to the bottle's instructions to neutralize chlorine and chloramine. Let it mix for a minute, then slowly pour the new water back into your tank — pouring over a plate, your hand, or a decoration helps prevent disturbing the substrate or stressing your fish with a sudden current. Once finished, plug your heater and filter back in and double-check that everything is running properly.
Pro Tips for a Cleaner Tank Between Water Changes
- Add a natural cleanup crew: Mystery snails, nerite snails, and corydoras catfish are fantastic at consuming leftover food and algae, reducing waste buildup between cleanings.
- Don't overfeed: Excess food is the number one cause of ammonia spikes. Feed only what your fish can finish in 2 minutes.
- Trim live plants regularly: Decaying plant matter adds to your bioload just like fish waste does.
- Keep a maintenance schedule: Consistency matters more than intensity — small, regular changes are always safer than large, infrequent ones.
Frequently Asked Questions
How often should I clean my freshwater tank?
For most home aquariums, a 20-30% water change every 1 to 2 weeks is ideal. Heavily stocked tanks may need weekly changes, while lightly stocked, well-planted tanks can sometimes stretch to every two weeks.
Do I need to remove my fish while cleaning?
No. In fact, it's best to leave your fish in the tank during routine cleaning. Removing them causes unnecessary stress from netting and temporary housing. Just work calmly and avoid sudden movements.
Why is my water cloudy right after a water change?
Mild cloudiness right after cleaning is usually just disturbed substrate particles and will clear within a few hours. If cloudiness persists for days, test your water — it could signal a bacterial bloom or an ammonia issue that needs attention.
Happy Fish Keeping!
Have a question about your specific tank setup? Click the "Ask Aqua AI" button on the bottom right of your screen to get instant help from our smart aquarium assistant!